Discover latest Indian Blogs
Showing posts with label Recycling ideas. Show all posts

Wednesday, 3 November 2021

DIY Diwali Decor - Tea Light Holder/Candle/Diya

So let's recycle something once again this Diwali!

I am sure most of us have those little acrylic paint bottles lying at home. Some dry up while others are used and empty. Normally we just chuck them away in the bin. But this festive season, lets have some colourful fun and recycle those mini glass bottles to make elegant tea light holders!

To begin with we need -

1. Empty and clean Acrylic Paint Bottles

2. Fevicryl Mouldit

3. Some Wax chips 

4. Wick

5. Paint

6. Brushes

7. Glue

8. Some Talcum powder

And some imagination!

So let's start by first cleaning up the bottle.

Take the mouldit packets and follow the instructions for mixing the clay.

Use some talc to make it non-sticky and smooth. After it is mixed evenly, divide the clay into 5 portions like this.

Take the biggest portion and roll it into a thin flat mould.

Apply some glue on the sides of the bottle and roll the clay on it. Make the surface even and smooth by rolling it a bit more. 

It doesn't need to be very even!

Then take the 2nd large portion of the clay and elongate it by rolling. Flatten the top part so that it looks like elephant's head and trunk.

Stick it on the bottle and put in some details if you wish to make it more elaborate.

Make the ears and the tail.


Let it dry and harden. Then paint it any way you like!

Then place the wick in the center and fill in the wax chips. These can be extracted from an old candle or you can easily find them in any craft store.

Find Wax Granules on ItsyBitsy

And don't worry if you don't have wax chips. Just put the ready to use tea light on top.  So, here's our very own handmade Glittering Diwali Decor ready!

It's not perfect but it's still lovely :D

Here's how it looks when lit up.

And some more...

Have Happy and Safe Diwali!


Tuesday, 17 December 2019

Paper Doll

This adorable doll can be easily made by using the empty kitchen towel roll and some scraps of wrapping paper and craft paper. So let's begin by gathering the required materials
1. Used kitchen towel roll
2. Scraps of gift wrapping paper and some craft paper
3. Sketch pens (pink, black)
4. A pair of scissors
5. Craft glue
6. Some flower stickers (optional)

First let's take the cardboard roll and wrap it with a light coloured craft paper.
 Use the craft glue to secure the paper.
Then take the wrapping paper piece and measure around the roll.
Cut 1cm strips from one end 3/4th way up the sheet as shown. Make sure you don't cut all the way. Once done, roll the ends slightly using a sketch pen to give a curly look. The skirt is ready.
Stick this skirt around the roll.
 Cut out the excessive paper if any.
Now I have taken 2 brown pieces of paper to make the hair, one small and the other slightly bigger.
On the small piece draw the outline of the front part using a sketch pen, as shown below and cut it in shape. Cut strips in the bigger piece of paper.
Stick the smaller piece first and then the back piece accordingly. Cut out the excess paper if needed.
 It will look like this when done.
Take another small scrap of craft paper matching or contrasting with the skirt's design and cut it as shown to make the bodice.
Glue it to the body of the doll.
Let's use the black sketch pen to make the eyes, eyebrows and lips.
Put a flower sticker on the hair to finish the look!
Isn't it amazingly cute!

Here's few more

 This one is my favourite! Dark is beautiful :)


Some more easy paper dolls.

Doll made from plastic bottle.


Saturday, 16 November 2019

Funky Play Bracelets

Most of the time we spend buying expensive kids accessories and our sweethearts end up either breaking them up or losing them within a tiny span of time. So, here is an idea that will enable us to reuse and recycle in an economical and easy way! And no one feels bad even if it breaks in an hour :D

Things required to make this absolutely swanky play bracelets for kids, are-

1. Some colourful plain/glitter foam sheets
2. Craft Glue
3. A pair of scissors
4. Empty Kitchen towel roll
5. Craft paper
6. Pencil

Let's get started by cutting out a 1.5" piece from the used up kitchen towel roll.
First mark an outline with a pencil so that the circular piece that we cut has equal width throughout.
Make a slit in this small roll as shown in the pic.
Now take a colourful craft paper and measure it with the bracelet to cut out a piece.
Stick the craft paper on the bracelet like this,
Fold the edges on the sides to make a neat base.
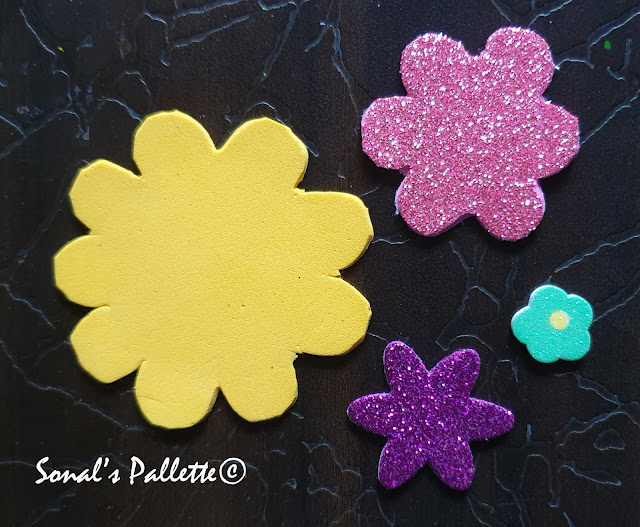
Now take a foam sheet and cut out a flower
We'll make a layered flower, hence I have cut out smaller pieces from different glitter paper and foam sheets.
Just stick them on top of each other to get the layered effect.

Stick the flower on the bracelet prepared earlier.
Let it set for a while.

You can make different shapes and styles as well.


Let the kids have fun with this easy-peasy pretend play DIY toy!!

You can also buy ready to use glitter foam sheet sticker here.